
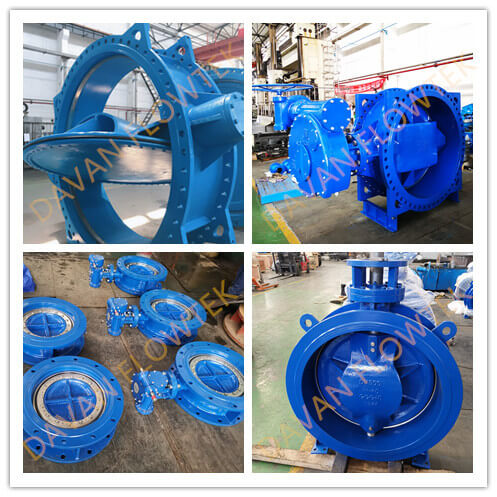
The wafer butterfly valve is one of the most common types of valves in industrial pipelines. The structure of the wafer butterfly valve is relatively small. It is only necessary to put the butterfly valve in the middle of the flange at both ends of the pipe, and use the stud bolt to pass through the pipe flange and the pair. The wafer butterfly valve is locked to control the fluid medium in the line and is especially suitable for places where the space is narrow or the distance between the pipes is short. When the butterfly valve is in the fully open position, the thickness of the disc is the only resistance when the medium flows through the valve body, so the pressure drop generated by the valve is very small,so it has better flow control characteristics.
1.The description of the wafer butterfly valve before installation:
1). Before the installation starts, use the air spray to remove the foreign objects on the piping, and clean the inside of the piping with clean water.
2). Carefully checking whether the valve usage is consistent with its performance specifications. (temperature, pressure)
3). Check the valve passage and sealing surface for any debris and remove it in time;
4). The valve should be installed in time after opening the box. Do not loosen any fastening screws or nuts on the valve at will;
5) The butterfly valve flange must use a special butterfly valve flange.
6) The electric butterfly valve can be installed on the pipe at any angle. For maintenance convenience, it is recommended not to install it upside down.
7) When installing the butterfly valve flange, ensure that the flange surface and the sealing rubber are centered, the screws are evenly tightened, and the sealing surface must be completely attached; if the screw tightening force is uneven, the rubber protrusion will catch the butterfly board, or hold against the valve plate causes a leak at the stem.
2.Installation steps:
The correct installation of the wafer butterfly valve is related to the sealing degree of the butterfly valve, and whether it will leak or not, including the safety in the working condition, and the user should understand the installation process.
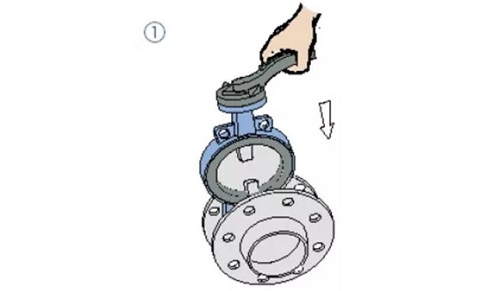
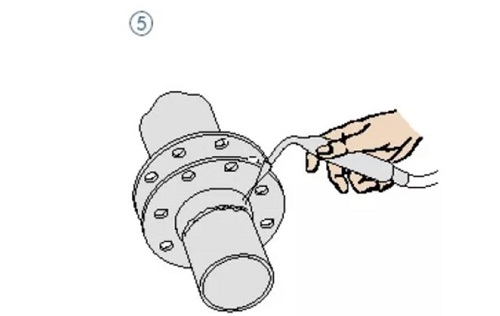
1). Place the valve between the two pre-installed flanges as shown, taking care to align the bolt holes
2) Gently insert the four pairs of bolts and nuts into the flange hole and tighten the nut slightly to correct the flatness of the flange surface.
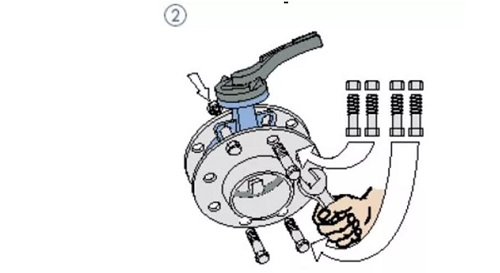
3) Fix the flange to the pipeline by spot welding
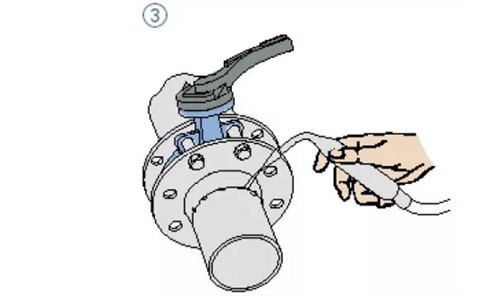
4) Remove the valve
5) The flange is completely welded and fixed on the pipeline.
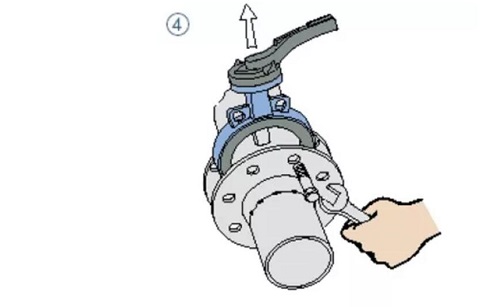
6) Install the valve after the weld is cooled. Ensure that the valve has sufficient space in the flange to prevent the valve from being damaged and to ensure a certain degree of opening of the valve plate
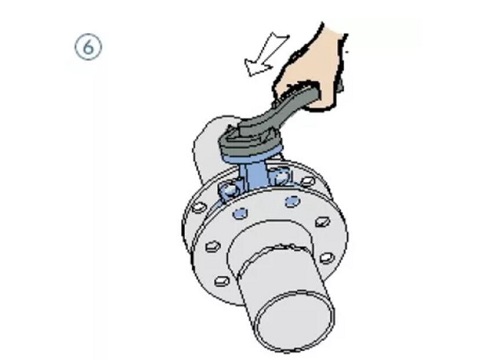
7) Correct the valve position and tighten the four pairs of bolts (be careful not to overtighten)
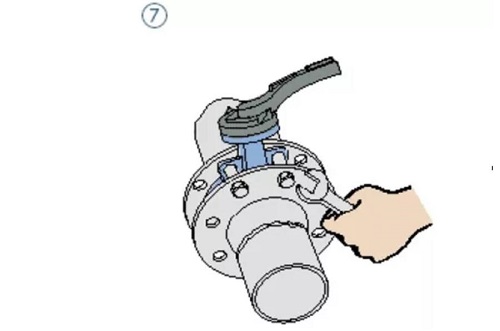
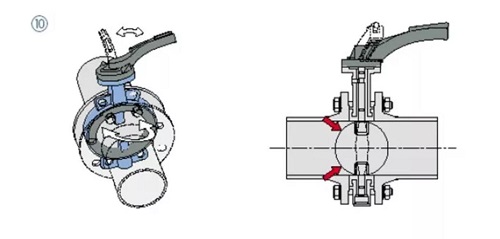
8) Open the valve to ensure that the valve plate can be opened and closed freely, and then the valve plate is slightly opened
9) Cross-balance equalize all nuts

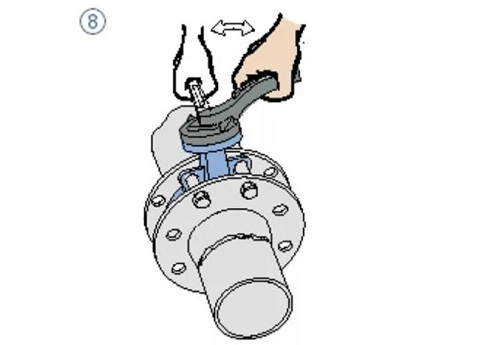
10) Re-confirm that the valve can open and close freely. Note: Make sure the valve plate does not touch the pipe.
The installation of the wafer butterfly valve must first be laid flat before installation. Remember to be free to bump. After the installation is made into the length of the installation, in the design of the on-site pipeline, no special permission is allowed. Feel free to disassemble the wafer butterfly valve, which we know before installation. At the same time, we must also know that the wafer butterfly valve can be installed in any position, but after the installation, it is necessary to lay the butterfly valve along the line and make a bracket for it. And once the bracket is made, it is strictly forbidden to remove the bracket during works.

Leave A Comment